WordPress is one of the most popular Content Management System out there in the internet running in more than 455 million websites. One of the convenient way to make website/blog using wordpress is to buy hosting and domain name, installing wordpress from cpanel and setting it up.
What if you want to try wordpress before paying for domain & hosting or want to play around in wordpress before launching your site live. So, that you will be familiar with it achieve what you are trying to achieve in your site via wordpress. In this article I am going to show you how you can install wordpress in localhost using XAMPP in these Five easy steps.
- Download Xampp
- Install and run Xampp in your pc
- Download WordPress
- Create database
- Install WordPress

Step 1: Download XAMPP
Xampp is the free, open source and cross platform web server solution stack package developed by Apache Friends. You can simply visit XAMPP’s official website to download XAMPP.
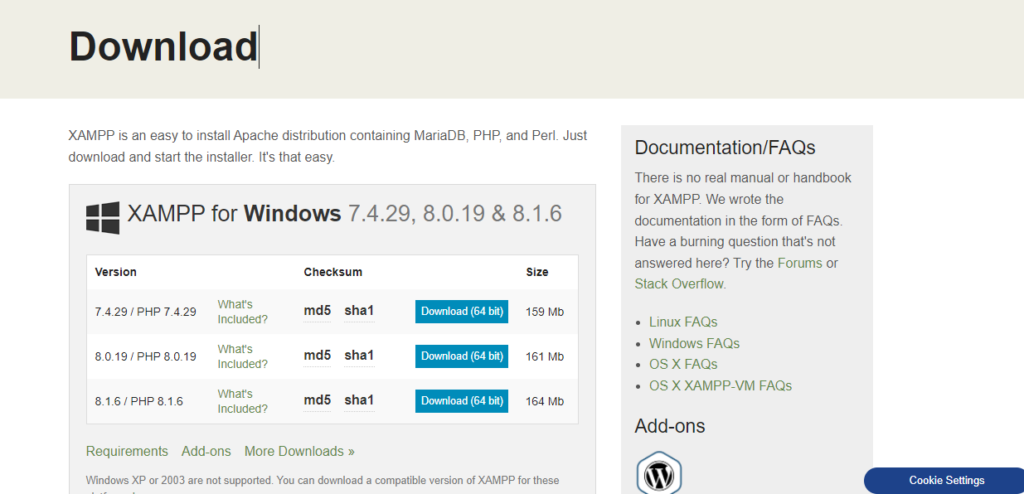
Now download the installation file according to your operating system and requirement.
Step 2: Install and run XAMPP in your PC
Once the download is completed, head over to downloads folder and open the exe file recently downloaded. After this you will be asked for permission, grant it and now you can installation window. Read the welcome message with additional info and click on next. Now you will see screen like this:
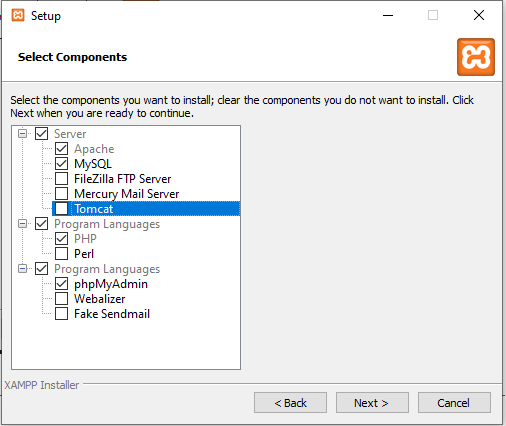
You can uncheck unnecessry server and program languages . Components shown in the above screenshot are enough to install wordpress in your local host.
Now choose the path where you want to install XAMPP make sure that you are not choosing C-drive, choose any other location instead. Now install xampp by simply clicking next button and finally install.
Once XAMPP is installed open it and you can see an interface like in the screenshot below:

Now click on start for the Apache and mysql module like this
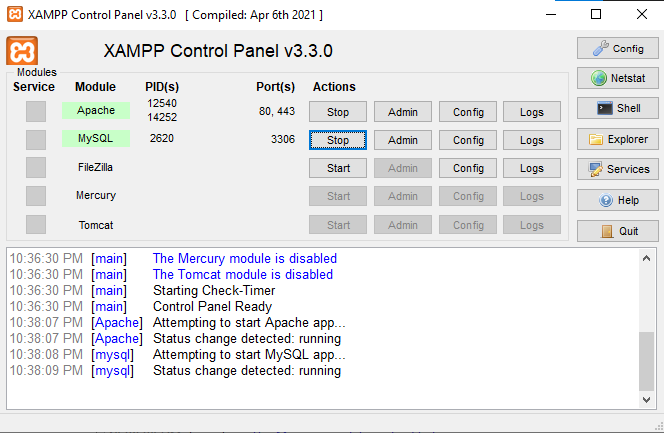
Now the webserver is running live in your local host. You can verify it by entering this address “”http://localhost/dashboard/” in url bar of your browser.

Step 3: Download WordPress
You can download latest wordpress by visiting WordPress official website. Clicking on that link takes you to this page:

Now download it by clciking on the link highlighted in the above screenshot.
After this open xampp and click on the explorer button at the middle of the right hand section.
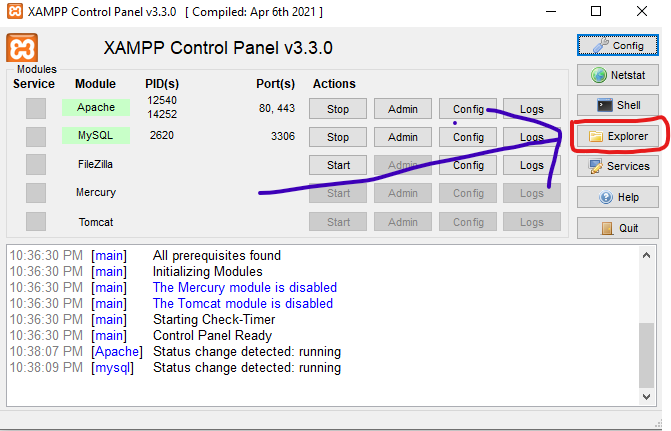
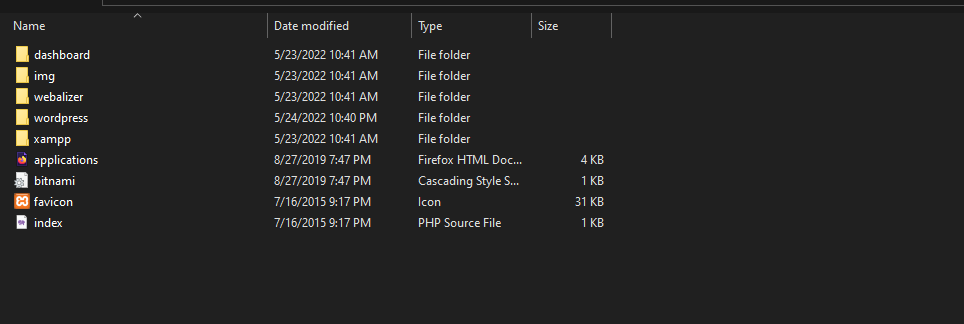
Clicking on this open the file explorer. Now find the folder named htdocs and open it.

Inside this folder named htdocs extract all the wordpress files that we have downloaded previously like this.
Step 4: Create database for WordPress
Now we have to create database for our wordpress website which is going to run in local host. For this, come back to XAMPP control panel and click on config in mysql row like in the screenshot below.
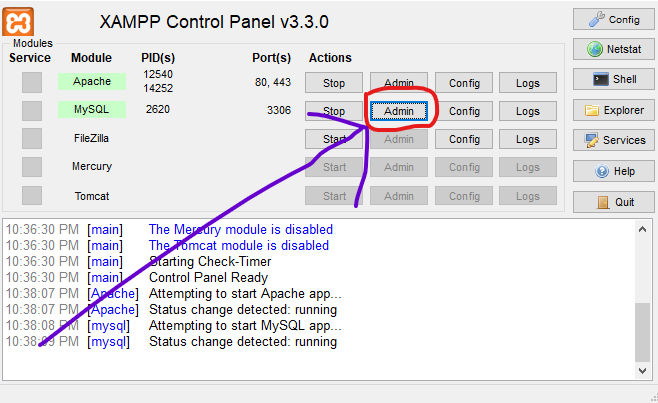
Clicking on this will open phpmyadmin page in your default browser. Now create new database by clicking on the databases option at the top.
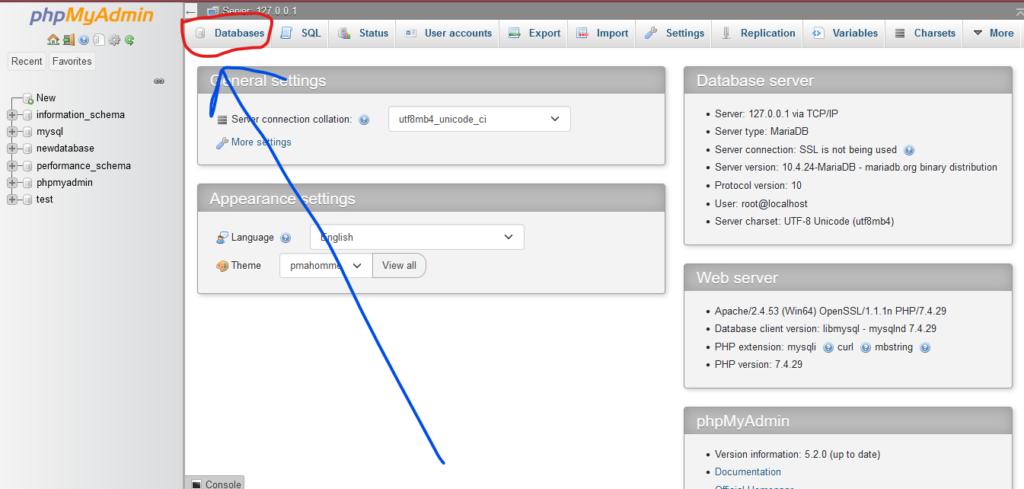
Now give database any name and create a new database like this.

Step 5: Install WordPress locally via Onscreen installer
Now you can paste this “http://localhost/wordpress”url in your browser to begin installing wordpress in your local device. Now start installing by selecting language and filling other details asked. In the database connection details enter the database name you created instead of mytest , database username will be root, password is empty by default and database host is local host. Fill the details like in the form shown below

Now you can start learning wordpress by adding some additional details like your site title description and by creating user details for your site. Now you can checkout the site you have build so far by adding this url in the browser
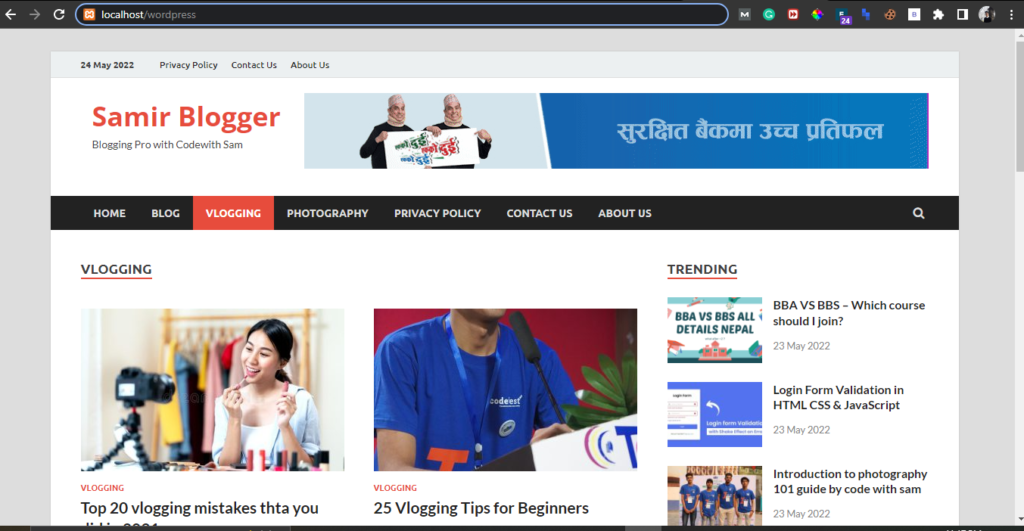
You can login to wordpress by using this link “http://localhost/wordpress/wp-admin”
Now you are good to play with wordpress in your very own localhost. I hope this guide helps you to install wordpress in your local host. If you face any issues while setting up wordpress in local host then please dont hesistate to let us know in the comment section below.